Coffee lovers know the importance of a good brew. But what if you run out of filters?
A DIY coffee filter can save your morning. It’s simple and effective, using items you already have at home. Crafting your own coffee filter not only offers a quick solution, but also encourages creativity and sustainability. Imagine the satisfaction of brewing your favorite coffee without making a trip to the store.
This approach helps reduce waste while ensuring you never miss that essential cup. In this guide, discover how to make a coffee filter using materials like paper towels or cloth. It’s a practical skill for any coffee enthusiast. Let’s dive into the world of DIY coffee filters and make your next cup both resourceful and rewarding.

Credit: allisonmariealexander.com
Choosing The Right Coffee Filter
Choosing the right coffee filter can elevate your coffee experience. Each filter type impacts taste and brewing time. This section will guide you through the essentials of selecting the perfect coffee filter for your needs.
Types Of Filters
Different filters cater to varied brewing methods. Paper filters are commonly used. They provide a clean, crisp taste. Metal filters offer a robust flavor. They allow oils and fine particles to pass through. Cloth filters give a balanced taste. They combine the benefits of paper and metal. Each filter type brings unique characteristics to your brew.
Material Options
The filter material greatly influences the coffee’s flavor profile. Paper filters are biodegradable and easy to use. They trap sediments efficiently. Metal filters are durable and reusable. They enhance the coffee’s full-bodied flavor. Cloth filters are eco-friendly and washable. They offer a smoother cup with less sediment. Consider your preference and sustainability when choosing a material.
Benefits Of Diy Coffee Filters
DIY coffee filters offer a budget-friendly and eco-friendly solution for coffee lovers. They reduce waste and ensure a fresh brew every morning. With simple materials, create custom filters to fit your coffee maker perfectly.
Brewing your own coffee at home is a delightful ritual that many cherish. However, the cost and environmental impact of single-use coffee filters can add up over time. DIY coffee filters present a practical solution, offering a range of benefits that make your morning cup not only more cost-effective but also environmentally friendly.
Cost-effectiveness
Switching to DIY coffee filters can save you money in the long run. Traditional paper filters require a constant supply, eating into your budget. By crafting your own filters from materials like cheesecloth or even a clean cotton handkerchief, you can reduce these recurring costs significantly. Consider the price of a pack of coffee filters and how often you buy them. Now, imagine making a one-time purchase of a few reusable materials that last months or even years. The savings quickly become apparent, allowing you to allocate those funds to other coffee delights.
Environmental Impact
DIY coffee filters contribute to a greener planet. Each disposable filter you use ends up in a landfill, adding to the growing waste problem. By creating and using your own reusable filters, you actively reduce your carbon footprint. Think about the number of coffee filters you throw away each week.
Now, multiply that by the number of coffee drinkers around the world. Your choice to switch to DIY filters can inspire others, creating a ripple effect that benefits the environment. Have you ever considered how small changes in your daily routine can lead to significant environmental benefits? Making your own coffee filters is a simple yet impactful step towards a more sustainable lifestyle.
Essential Supplies Needed
Creating your own DIY coffee filter can be a fun and rewarding experience. You’ll need some essential supplies to get started. Whether you’re looking to save money or simply enjoy the satisfaction of crafting something yourself, having the right tools and materials is crucial. Let’s dive into the essentials that will help you brew that perfect cup.
Basic Tools
First, gather your basic tools. You’ll need a pair of scissors or a sharp knife. These will help you cut the filter material to the right size. A ruler can be handy for measuring dimensions accurately. If precision is your thing, grab a pencil to outline your design.
Consider keeping a small sewing kit nearby. A needle and some thread can be useful for stitching edges if you’re using fabric. It’s like sewing a small project that results in a delicious coffee experience!
Lastly, a clean workspace is essential. Ensure your area is free from dust and debris. You wouldn’t want any unwanted particles in your coffee, right?
Filter Materials
Now, let’s talk about filter materials. Coffee filters can be made from several types of materials, each offering different benefits. Cotton fabric is a popular choice for its durability and reusability. It’s soft yet sturdy, making it ideal for multiple uses.
Consider using cheesecloth if you’re aiming for a lighter brew. Its porous nature allows water to pass through easily, extracting flavors without trapping them. Cheesecloth is also readily available at most grocery stores.
If you’re feeling adventurous, try using paper towels. They’re easily accessible and do a great job in emergencies. Just ensure they are unbleached and chemical-free to avoid any unwanted tastes in your coffee.
Have you ever tried using a combination of materials? Mixing cotton and paper can offer a unique brewing experience. Experimenting with different materials might lead you to discover the perfect filter for your taste.
So, which materials are you curious to try? Will your choice be driven by convenience or flavor? The journey of DIY coffee filters is as much about the process as it is about the end result. Remember, the perfect coffee starts with the perfect filter!
Credit: europeancoffeetrip.com
Step-by-step Crafting Guide
Creating your own coffee filter at home can be a fun and rewarding project. Whether you’re out of filters or want to personalize your coffee experience, this guide will walk you through the process. You’ll need some basic supplies and a little bit of creativity. Follow these steps to craft a functional and unique coffee filter.
Cutting The Filter
Start by selecting your material. You can use unbleached paper or even cloth. Make sure it’s clean and safe for use. Cut the material into a circle. The diameter should be slightly larger than your coffee maker. This ensures a snug fit. Using scissors with sharp blades helps achieve a clean cut.
Fold the circle in half. Then fold it again to create a quarter circle. This helps in forming the filter shape. Cut along the edges to fine-tune the size. Aim for a consistent shape without jagged edges. Your filter is almost ready for assembly.
Assembling The Filter
Unfold the quarter circle. You should have a full circle with crease lines. These lines guide the next steps. Fold along the creases to form a cone shape. The cone should fit easily into your coffee maker. Adjust the folds for a perfect fit.
Secure the cone with a small paperclip. This keeps the shape intact during use. Ensure the bottom is flat. This allows even water distribution. Your DIY coffee filter is ready to test. Place it in your coffee maker and brew as usual.
Enjoy the satisfaction of using your handmade filter. It’s an eco-friendly and cost-effective solution. Plus, it’s a great conversation starter.
Customizing Your Coffee Filter
Creating your own coffee filter adds a personal touch to your brewing ritual. Use cloth or paper to craft a unique filter that suits your taste. Experimenting with materials and shapes can enhance flavor and make your morning coffee experience more enjoyable.
Customizing your coffee filter can transform your daily brew into a personal experience. Instead of settling for standard options, why not tailor your coffee filter to suit your unique taste and style? With a few simple adjustments, you can enhance both the functionality and aesthetics of your coffee-making process.
Size And Shape
Choosing the right size and shape for your coffee filter is crucial. Have you ever noticed how a slightly bigger filter can alter the flavor of your coffee? Consider measuring your coffee maker’s basket and experimenting with different sizes to see what works best for you. Think about the shape, too. Cone-shaped filters can bring out different flavors compared to flat-bottom ones. If you’re feeling adventurous, try cutting a filter into a unique shape that fits snugly in your coffee maker, ensuring even water distribution.
Personal Touches
Infuse your personality into your coffee filter by adding personal touches. Dying your filter with food-safe colors can add a splash of joy to your morning routine. Imagine starting your day with a vibrant blue filter that reflects your personality. You can also draw or write on your filters using food-safe markers.
A motivational quote or a simple doodle can brighten your day. Have you considered adding your favorite scent by storing filters with dried lavender or vanilla beans? Customizing your coffee filter not only enhances your coffee experience but also brings a bit of fun and creativity into your daily routine. What small change could make your mornings more delightful?

Credit: www.youtube.com
Brewing Techniques With Diy Filters
Brewing coffee with DIY filters can be a rewarding experience. It adds a personal touch to your daily ritual. Whether you’re using paper towels or cloth, these filters work well. They can provide a unique flavor profile to your cup. Let’s explore some brewing techniques using DIY filters.
Pour Over Method
The pour over method is simple yet effective. Place your DIY filter in the dripper. Add freshly ground coffee to the filter. Heat water to just below the boiling point. Pour water in a circular motion over the grounds. Start from the center and move outwards. Allow the coffee to drip through the filter. This method highlights the coffee’s natural flavors. It’s a great way to enjoy a smooth and rich cup.
Drip Coffee Method
Using a DIY filter in a drip coffee maker is easy. Fit your filter into the machine’s basket. Add your coffee grounds to the filter. Fill the reservoir with water. Turn on the machine and let it brew. The hot water will pass through the grounds. It will extract the flavors into your cup. This method is convenient and consistent. Perfect for a busy morning or a lazy afternoon.
Maintaining Your Coffee Filter
Maintaining your coffee filter is crucial for ensuring every cup you brew is as delicious as possible. A well-cared-for filter can make a world of difference in your coffee experience, enhancing flavors and aromas. Proper upkeep extends the life of your filter and keeps your morning ritual hassle-free.
Cleaning Techniques
Keeping your coffee filter clean is a straightforward but essential task. After each use, rinse it under warm water to remove coffee grounds and oils. This simple act prevents buildup and keeps your filter fresh.
Once a week, give your filter a deeper clean. Soak it in a mixture of equal parts water and vinegar for about 30 minutes. This helps to dissolve stubborn residue and odors that might linger after daily rinsing.
Have you noticed a decrease in your coffee’s flavor? It’s a sign your filter needs attention. Regular cleaning not only preserves taste but also ensures your equipment is always ready for action.
Storage Tips
Proper storage of your coffee filter can significantly impact its longevity. After cleaning, allow it to air dry completely before storing. Moisture can encourage mold growth, which is something you definitely want to avoid.
Store your filter in a cool, dry place. A kitchen cabinet away from heat sources is ideal. Avoid areas that are exposed to direct sunlight, which can cause wear and tear over time.
Consider using a breathable container or bag for storage. This keeps dust away while allowing air circulation. Have you ever found your filter with an off smell? Good storage practices prevent this issue.
Maintaining your coffee filter may seem trivial, but these small efforts can transform your coffee experience. Is your coffee tasting as good as it could be? Taking care of your filter is a practical step toward perfection.
Troubleshooting Common Issues
Troubleshooting common issues with DIY coffee filters can enhance your coffee experience. These filters may encounter problems affecting their durability and brew quality. Addressing these concerns ensures a perfect cup every time.
Filter Durability
DIY coffee filters can sometimes wear out quickly. The material used plays a crucial role in this. Opt for sturdier materials like muslin or tightly woven cotton. These materials withstand multiple uses without tearing. Proper cleaning also extends the filter’s life. Rinse thoroughly and dry completely after each use. Avoid harsh detergents; they weaken the fabric over time. For best results, replace your filter periodically. A worn filter may compromise your brew’s taste.
Brew Quality Concerns
Brew quality is a common concern with DIY filters. Using the right coffee grind size is essential. Too fine a grind clogs the filter, affecting flow. Too coarse a grind leads to weak coffee. Experiment with grind sizes for optimal results. Water temperature also impacts brew quality. Ensure the water is hot but not boiling. Boiling water may lead to a bitter taste. Finally, check the filter fit in your coffee maker. A poor fit might cause uneven extraction. Adjust the filter or coffee amount for better results.
Frequently Asked Questions
What Can You Use Instead Of A Coffee Filter?
You can use a paper towel, a clean dish towel, or a cheesecloth as a coffee filter substitute. A reusable metal or mesh strainer also works well. Each option effectively filters coffee grounds while allowing the liquid to pass through.
How Can I Make A Homemade Coffee Filter?
Use a paper towel or a clean cloth as a homemade coffee filter. Place it in your coffee maker or cup. Add coffee grounds on top, then pour hot water slowly. Let it drip through. Ensure your filter material is clean and free from any residues for the best taste.
How To Filter Coffee Without A Filter?
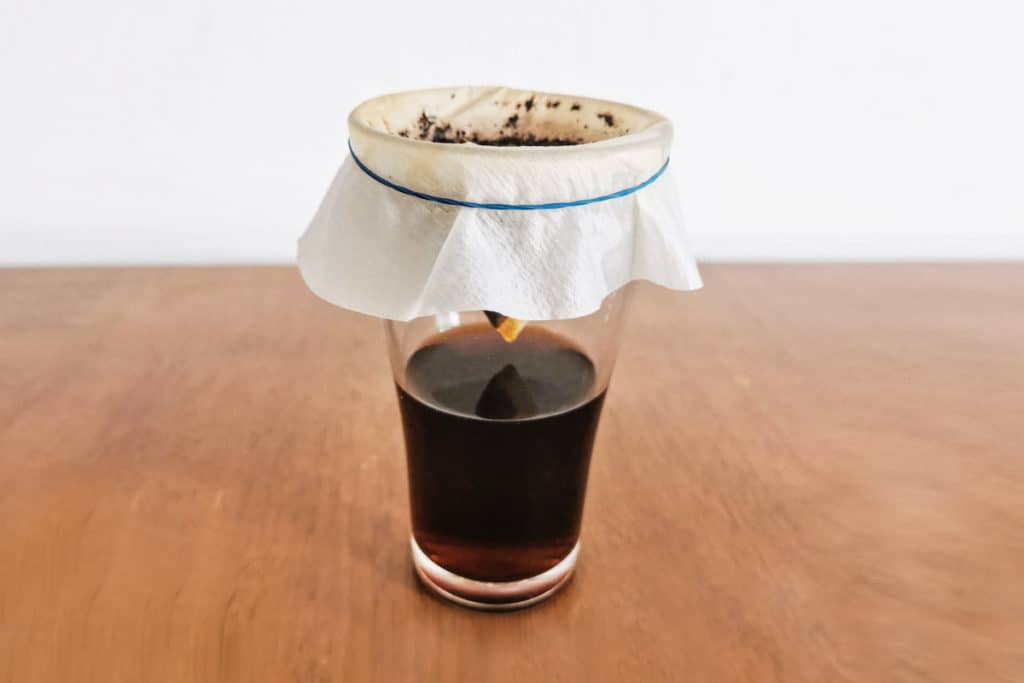
Use a clean cloth or paper towel to filter coffee. Secure it over a mug, pour slowly. Coffee grounds will be trapped, allowing liquid to pass through.
How Do You Use A Paper Towel As A Coffee Filter?
Fold a paper towel into a square shape. Fit it into the coffee maker’s basket, ensuring no gaps. Add coffee grounds and pour hot water slowly. Make sure the paper towel is strong enough to hold the grounds. Enjoy your freshly brewed coffee.
Conclusion
Creating a DIY coffee filter is simple and effective. You save money and reduce waste. The process is easy and fun. Just gather a few materials. Follow the steps, and enjoy fresh coffee. You may experiment with different fabrics. Find what works best for your taste.
Homemade filters can be reused. They also offer a unique brewing experience. Perfect for eco-friendly coffee lovers. Enjoy a fresh cup every morning. With a DIY coffee filter, you take control. Make your coffee routine better. Try it today and taste the difference.