Keurig machines make coffee brewing easy and quick. But sometimes, they stop working.
It’s frustrating when your morning coffee routine gets disrupted. You rely on your Keurig for that perfect cup. When it stops, it’s like a mini crisis. Why does this happen? There could be several reasons. It might be a simple fix or require more attention.
Understanding common issues can help. You can troubleshoot and possibly save your machine. In this guide, we’ll explore common problems and solutions. You’ll learn how to get your Keurig back on track. Let’s dive into ways to fix your machine and enjoy your coffee again.
Common Issues
Keurig machines are popular for their convenience and ease of use. But sometimes, they stop working properly. Knowing the common issues can help you troubleshoot and fix them. Here are some frequent problems users face with their Keurig machines.
Power Problems
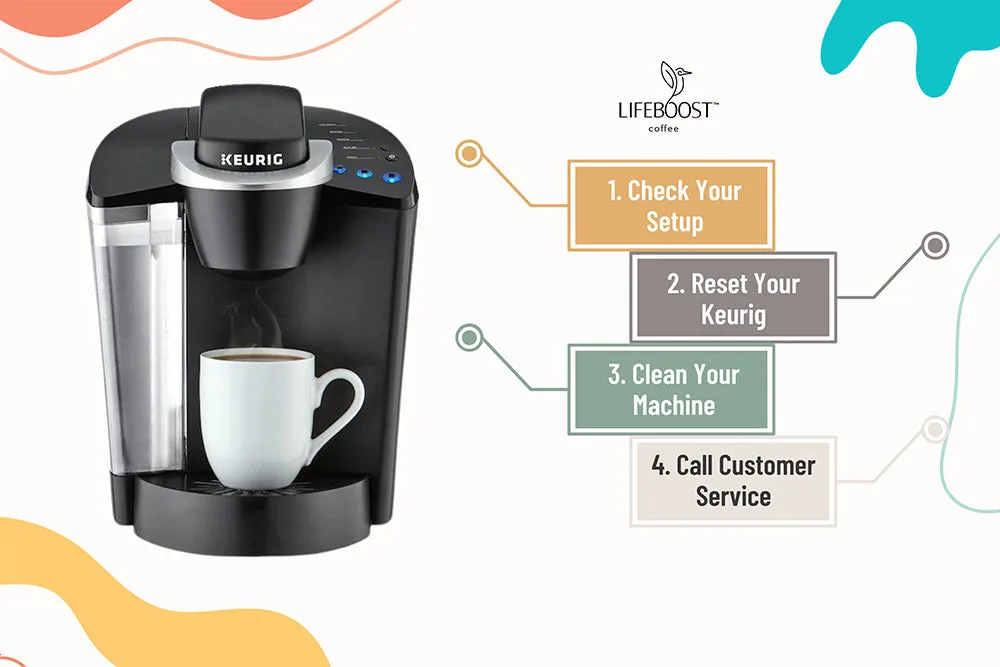
A Keurig machine not turning on is frustrating. First, check if it’s plugged in. Sometimes, the cord is loose or disconnected. Ensure the outlet is working by plugging in another device. If the machine still doesn’t power on, examine the power button. Press it firmly and hold for a few seconds. If it’s still unresponsive, a fuse may be blown. Consult your manual for instructions on checking the fuse.
Water Reservoir Issues
The water reservoir is crucial for brewing coffee. If the machine isn’t brewing, check the water level. It needs enough water to function properly. Fill the reservoir to the max line if needed. Ensure the reservoir is seated correctly. Sometimes, it shifts during cleaning or filling. Remove and reinsert it securely. Examine the reservoir for cracks or leaks. A damaged reservoir can affect brewing. Consider replacing it if necessary.

Credit: lifeboostcoffee.com
Troubleshooting Basics
We’ve all been there: eagerly anticipating that first sip of morning coffee, only to find the Keurig machine isn’t working as expected. But before panic sets in, there’s good news. Many common issues can be resolved with simple troubleshooting steps. Let’s dive into some basics to get your Keurig back on track.
Resetting The Machine
A quick reset can often solve minor issues. If your Keurig isn’t brewing, try turning it off and unplugging it. Leave it unplugged for about 5 minutes. This gives the machine a chance to clear any glitches. Plug it back in, turn it on, and test with a fresh pod. You might be surprised how often this simple reset works.
Remember, machines can sometimes get confused, just like us. A reset is like giving it a little nap, letting it wake up refreshed and ready to brew.
Cleaning The Machine
Another common culprit for a malfunctioning Keurig is a dirty machine. If you’ve noticed slower brewing or less flavorful coffee, it might be time for a clean. Begin by removing and cleaning the drip tray and pod holder. These areas can collect coffee grounds and residue over time.
Descaling is essential for maintaining your Keurig. Use a descaling solution or a mixture of white vinegar and water. Run this through the machine to remove mineral buildup. This not only improves performance but also extends the life of your Keurig.
Think about it: Would you drink coffee from a cup that hasn’t been cleaned in months? Your Keurig deserves the same level of care.
What if these steps don’t work? Are there other methods you can try? Sometimes the answer is simpler than you think. If resetting and cleaning don’t solve the problem, consider checking the water reservoir for any blockages or ensuring the power cord is securely connected. Taking time to troubleshoot can save you from buying a new machine, keeping your coffee routine uninterrupted.
Fixing Power Problems
Picture this: it’s a chilly morning, and all you need is a steaming cup of coffee from your trusty Keurig machine. But alas, it won’t power on. Fixing power problems with your Keurig machine can seem daunting, but with a bit of troubleshooting, you might just be sipping your favorite brew sooner than you think. Let’s dive into some practical steps to tackle these issues.
Checking The Outlet
First things first, verify that your outlet is working properly. Sometimes, the issue isn’t with the machine but with the power source itself. Try plugging another device into the same outlet. Does it power on? If not, the outlet might be the culprit. Consider using a different outlet or resetting your circuit breaker. It’s surprising how often a tripped breaker can be the hidden reason behind power problems.
Inspecting The Power Cord
Next, let’s examine the power cord. A damaged cord can be the silent saboteur preventing your Keurig from powering on. Look for any visible damage like fraying or cuts. Gently wiggle the cord to ensure it’s properly connected to the machine and the outlet. Have you ever had a cord that seemed fine, only to discover a tiny kink causing chaos? A replacement cord might be the simple fix your Keurig needs.
By tackling these two areas, you can often pinpoint and resolve why your Keurig isn’t working. Have you ever wondered how many mornings have been saved by a simple cord replacement or outlet reset? The answer might surprise you. Don’t let a power issue keep you from that perfect cup of coffee. What steps will you take today to get your Keurig back in action?

Credit: www.wikihow.com
Water Flow Solutions
Is your Keurig machine acting up? Water flow issues can disrupt your coffee routine. Knowing how to fix them can save you time and stress. Common problems include clogged needles and mineral buildup. Let’s explore some effective solutions.
Unclogging Needles
Clogged needles are a frequent cause of water flow problems. These needles pierce the coffee pod and allow water to flow through. Use a paper clip to clear debris. Straighten a section of the clip and gently insert it into the needle. Rotate to dislodge any blockage. This simple fix can restore proper water flow.
Descaling The System
Mineral deposits can build up over time. They affect the machine’s performance. Regular descaling helps remove these deposits. Use a descaling solution or vinegar for this process. Fill the water reservoir with your chosen solution. Run the machine without a coffee pod several times. This cleans the internal components. Rinse the reservoir thoroughly afterward. This ensures no residue affects your next brew.
K-cup Issues
Experiencing trouble with your Keurig machine might be frustrating. Common issues include clogged needles or faulty power connections. Ensuring regular cleaning and checking power sources often resolves these problems.
If your Keurig machine isn’t working, the issue might be with the K-Cup. This small pod can be the root of many problems, from brewing inconsistencies to unexpected errors. Before you blame the machine, it’s worth taking a closer look at how you’re using your K-Cups.
Proper Insertion
Ensuring your K-Cup is correctly inserted can solve more issues than you’d think. Misalignment is common, especially when you’re in a rush. Make sure the K-Cup is snugly placed in the holder, with the top facing upwards. A poorly inserted K-Cup can lead to brewing failures or leaks. Have you ever opened the brewer to find coffee grounds everywhere? That’s a sign something went wrong with the insertion. It’s also worth checking if the needle that pierces the K-Cup is clean and unobstructed. A simple wipe with a damp cloth can prevent a lot of headaches.
Checking Compatibility
Not all K-Cups are created equal. Some may not be compatible with your specific Keurig model. Check the packaging for compatibility notes to ensure you’re using the right type. Using an incompatible K-Cup might seem like a small oversight, but it can prevent the machine from functioning properly.
Imagine trying to fit a square peg in a round hole—frustrating, right? Have you switched brands recently? If so, double-check the K-Cup’s fit and design. Small differences can have a big impact on whether your Keurig will accept the pod. If you’ve ever been left without your morning coffee because of a simple compatibility issue, you know how crucial it is to get this right. Don’t let a small oversight ruin your day.

Credit: www.youtube.com
Brew Size Problems
Experiencing brew size issues with your Keurig can be frustrating. Ensure your water reservoir is filled to the correct level. Check if the machine needs cleaning to resolve brew inconsistencies.
Having a Keurig machine is a blessing for coffee lovers, but nothing can be more frustrating than when it doesn’t brew the right amount of coffee. You fill your mug, eagerly waiting for that perfect cup, only to find it’s not even half full. Or worse, your cup overflows, creating a mess. These brew size problems can be a real hassle, but don’t worry, there are practical solutions you can try.
Adjusting Settings
Start by checking the brew size settings on your Keurig machine. Often, the issue lies in accidentally pressing the wrong button or setting. Ensure you select the correct cup size by consulting your machine’s manual. Sometimes, resetting the machine can resolve the issue. Unplug it, wait a few minutes, and plug it back in.
This simple step can recalibrate the machine, fixing any temporary glitches in the settings. If you notice a recurring problem with brew sizes, consider a factory reset. This will restore the machine to its original settings, which can solve persistent issues. However, be aware this will erase any custom settings you have previously configured.
Ensuring Water Levels
One overlooked factor is the water reservoir level. If the water level is too low, the machine might not brew the full cup size you desire. Make sure the reservoir is filled to the appropriate line before starting your brew. Check for any blockages in the water line, as these can impact the amount of water dispensed. A quick clean using a gentle descaling solution can clear any obstructions and improve water flow.
Occasionally, air bubbles can form in the water line, leading to inconsistent brew sizes. Try removing the reservoir, shaking it gently, and then reseating it to dislodge any trapped air. Have you experienced any other quirky issues with your Keurig? Sometimes the simplest adjustments can restore your machine to perfect working order. Don’t let brew size problems ruin your coffee experience—take these steps and enjoy your perfect cup every time.
Temperature Concerns
Temperature concerns are common with Keurig machines. A cup of coffee may be too cold or too hot. This disrupts the perfect coffee experience you crave. Understanding these issues helps you fix them effectively. Let’s explore how to address temperature problems in your Keurig machine.
Heating Element Check
The heating element is crucial for brewing hot coffee. A malfunctioning element causes temperature issues. Inspect the element for visible damage or wear. Use a multimeter to test its functionality. A faulty element requires replacement to restore proper temperature.
Thermostat Adjustments
The thermostat regulates the machine’s temperature. Incorrect settings can lead to cold coffee. Locate the thermostat inside the machine. Adjust it to the recommended temperature setting. Ensure it is not stuck or blocked. A well-adjusted thermostat ensures perfect coffee warmth.
Maintenance Tips
A Keurig machine not working can often be fixed with simple maintenance. Clean the needle and descale regularly. Ensure water reservoir is properly seated.
Maintaining your Keurig machine can significantly extend its lifespan and ensure that every cup of coffee tastes as good as the first. Many users often overlook simple maintenance routines, but they are crucial for keeping your machine in top shape. Think about it: would you skip servicing your car and expect it to run smoothly forever? The same principle applies to your Keurig. Regular Cleaning
Regular cleaning is essential. Dust, coffee grounds, and mineral build-up can all affect your Keurig’s performance. Start by removing the water reservoir and drip tray. Wash these parts with warm, soapy water. Avoid harsh chemicals that might leave a residue. Take a damp cloth and wipe down the exterior.
Don’t forget the area around the pod holder, where coffee grounds often collect. If your machine has a removable pod holder, rinse it under running water. A small brush can help dislodge any stubborn coffee remains. Tip: Clean your Keurig at least once a week. It’s a small task that makes a big difference.
Scheduled Descaling
Descaling is crucial for maintaining your Keurig’s efficiency. Over time, minerals from water can build up inside the machine, affecting the heating element and water flow. Use a descaling solution or a mixture of equal parts water and vinegar. Fill the water reservoir and run a brewing cycle without a coffee pod. Let the solution sit for 30 minutes to an hour. This ensures the internal parts are thoroughly cleaned. Run several cycles of plain water afterward.
This removes any vinegar taste from your machine. Consider descaling every three months. If you have hard water, you might need to do it more often. Question: Have you noticed a change in your coffee’s taste or brewing time? It might be time to descale your machine. Maintaining your Keurig might seem like a chore, but these simple tips can make all the difference. By investing a little time in care and cleaning, you can enjoy delicious coffee and a trouble-free machine for years to come.
Frequently Asked Questions
What Causes My Keurig To Stop Working?
Common causes include clogged needles, mineral buildup, or power issues. Descale regularly to prevent mineral buildup. Check the power connection and reset the machine if needed. Clean the needles to ensure proper water flow. Regular maintenance can help keep your Keurig functioning efficiently.
How Do I Force My Keurig To Reset?
To reset your Keurig, unplug it for a few minutes. Plug it back in, then turn it on. Remove the water reservoir and reattach it securely. Open and close the K-cup holder. This should reset the machine and resolve minor issues.
When I Press The Button On My Keurig, Nothing Happens.?
Ensure your Keurig is plugged in securely. Check for any error messages on the display. Confirm the water reservoir is filled and properly positioned. Try resetting the machine by unplugging it for a minute. If issues persist, consult the user manual or contact Keurig support for assistance.
How Do I Fix My Keurig Not Pumping Water?
Clean the Keurig’s water reservoir and check for clogs. Use a paperclip to clear the needle. Descale the machine regularly to prevent build-up. Ensure the water reservoir is seated correctly. Reset the Keurig by unplugging it for a few minutes.
Conclusion
Troubleshooting a Keurig can save time and frustration. Regular maintenance prevents issues. Clean the machine often. Check for clogs and replace filters. Simple steps can fix most problems. A smooth cup of coffee awaits. Enjoy a hassle-free brewing experience. Share tips with friends facing similar issues.
Keurig machines offer convenience but need care. Keep your machine running smoothly. Avoid costly repairs. Use the guide to solve common problems. Now, you’re ready for a perfect brew. Happy coffee-making!